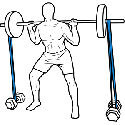
 Do you ever find yourself struggling with Handstands? Are you looking for a way speed up your progress? Turns out our Resistance Bands provide an excellent set of training wheels for support to help guide you into correct position. With this particular type of assistance you’ll need to have either a pullup bar or suspended overhead post. For many people, the best two RubberBanditz bands for this workout would be the black and purple band combo for beginner/intermediate 'handstanders' or the black and red combo for advanced ‘handstanders’ who have mastered the handstand and are working on handstand pushups.
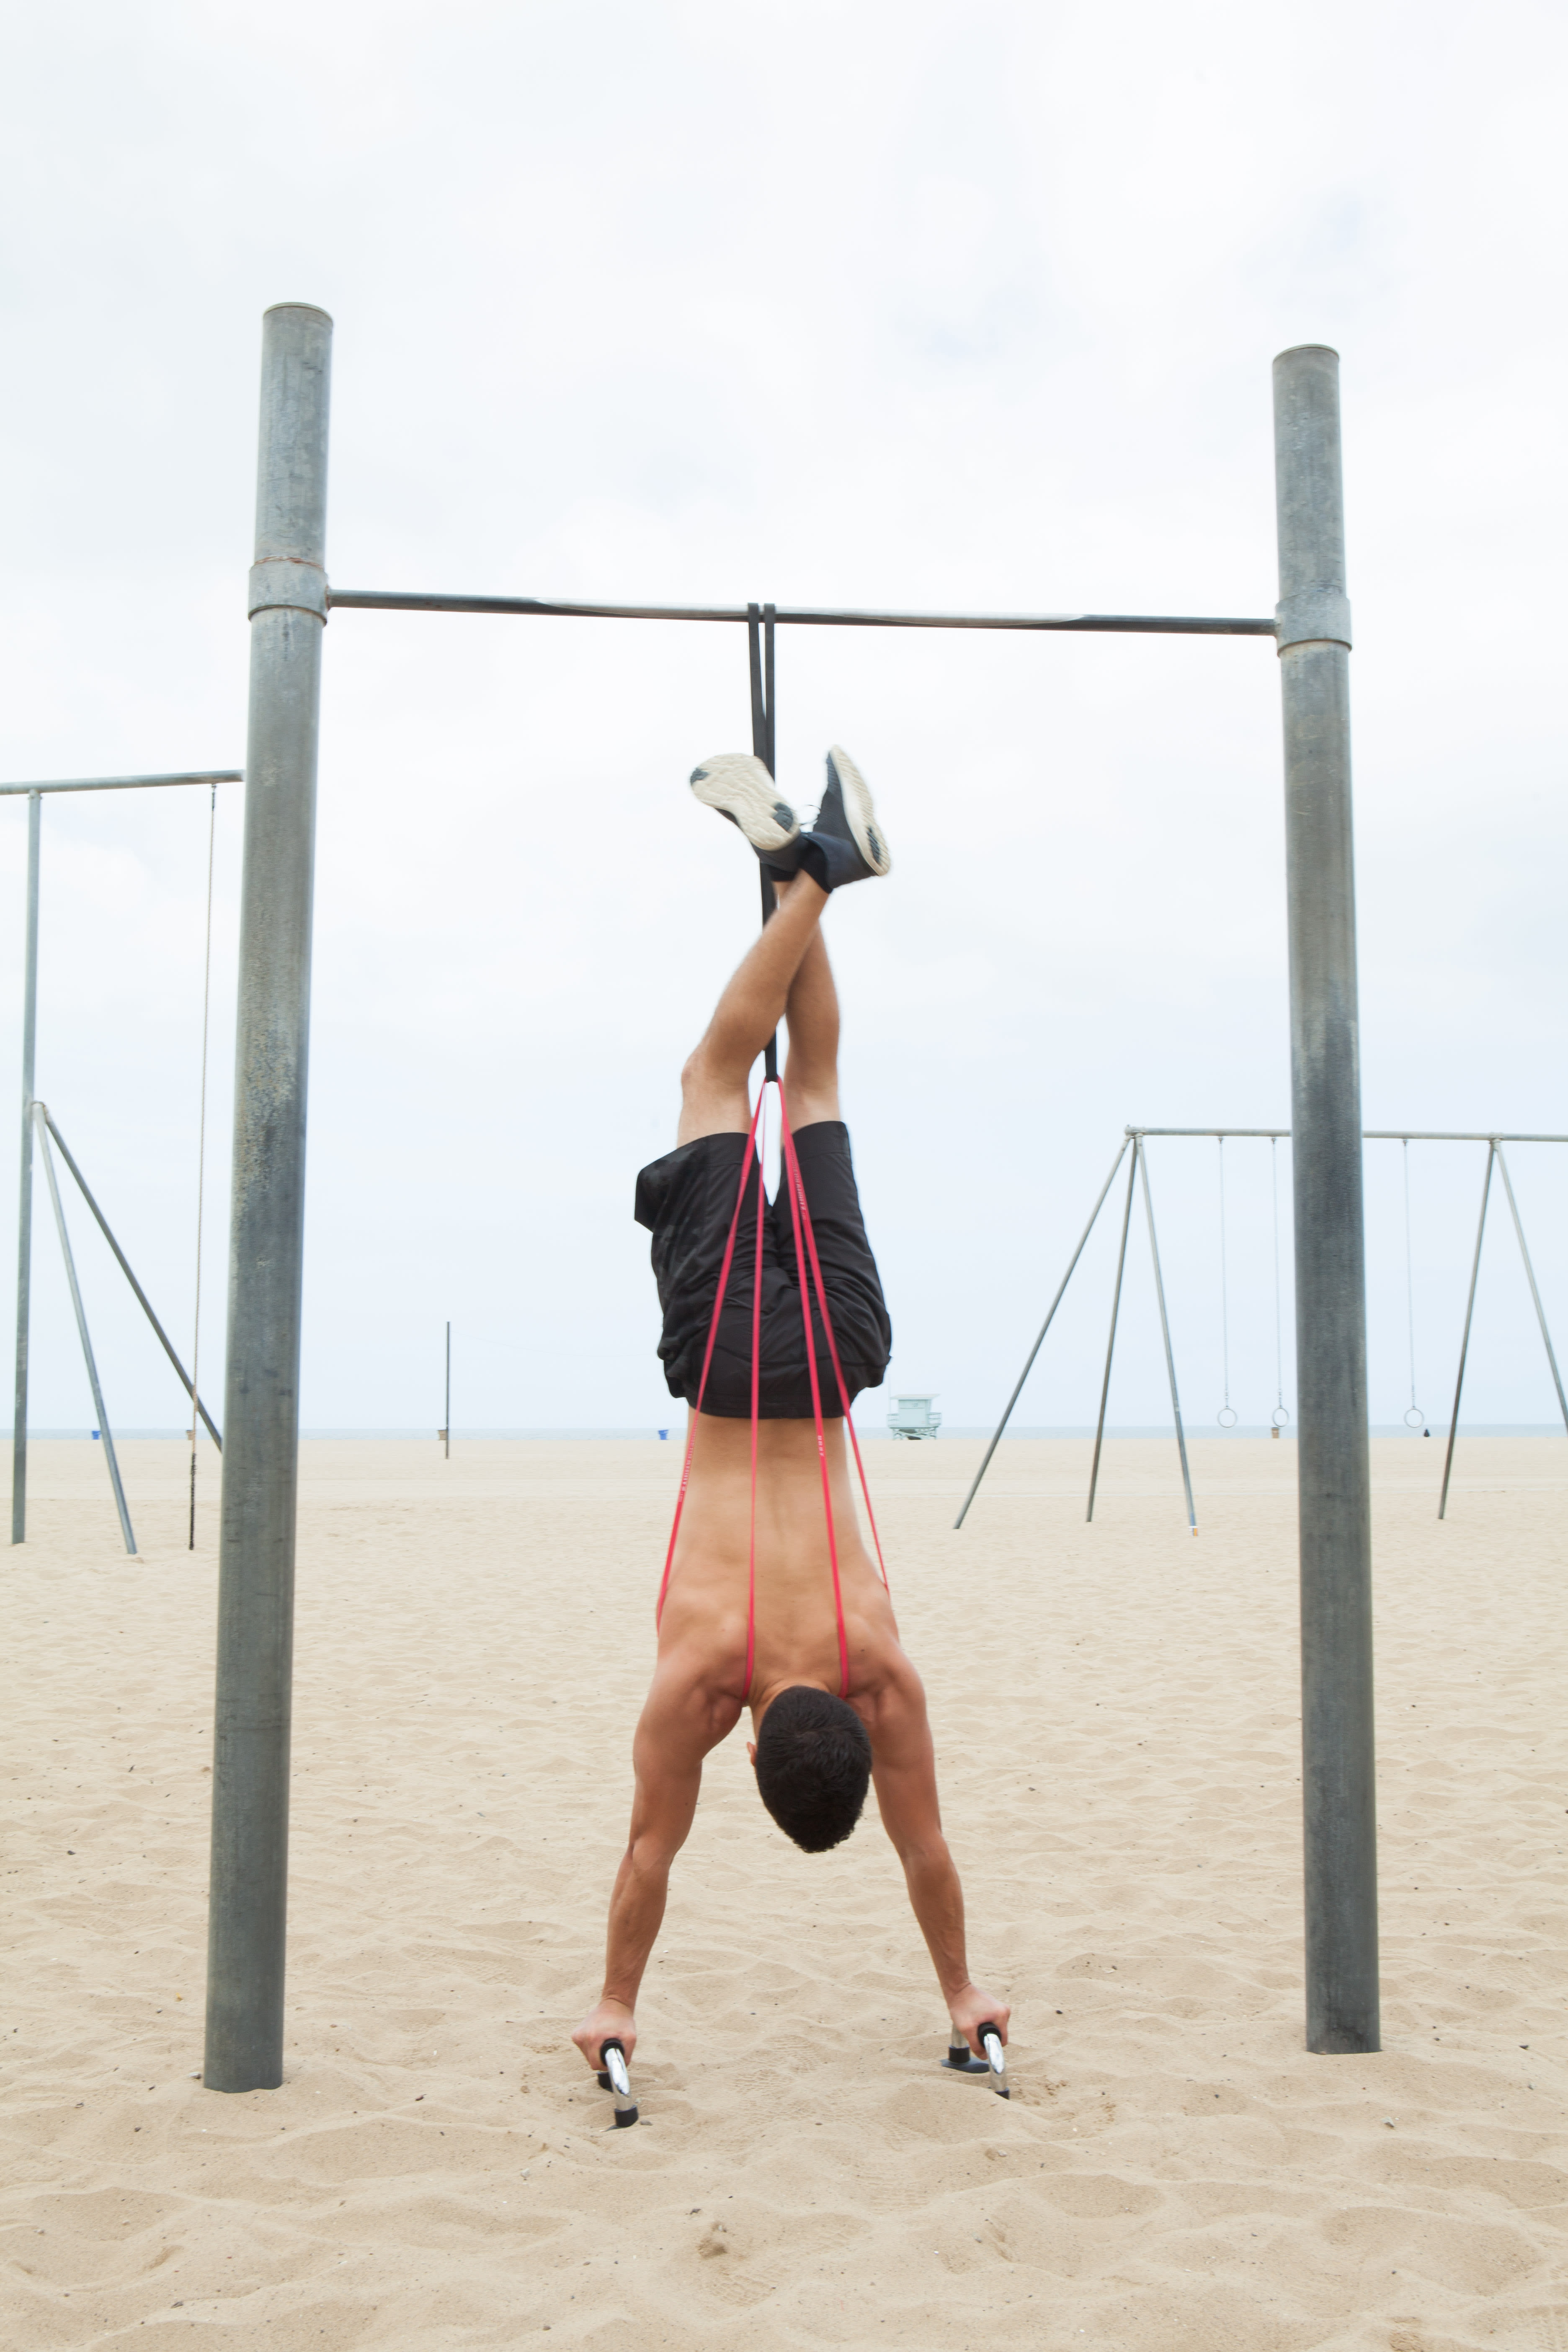
First start by setting up the bands on the bar [or post]. Assuming you are using the two sizes I suggested, begin by draping the heavier band over the top of the pullup bar. Then, take the skinnier band and feed it through the middle of the thicker band. Next, you’ll want to insert both of your arms into the new loops created by the bottom band and then place your hands on the ground into a comfortable handstand position. Hands should be about shoulder width apart with your two pointer fingers pointing forward. Now jump up into a handstand position by swinging you legs back forcefully enough so that they reach the bands and then wrap your feet around the resistance bands to stabilize yourself.
When you get to this step it may feel a bit scary and you might think you’re going to fall, but just remember to use the bands for support by locking your feet around it for security. This position inevitably feels weird at first, but gives a your bodyweight a spotter to aid in building shoulder strength. The key here is building up enough strength in your wrists, elbows and shoulders to hold your body still. Make sure to do ample wrist stretching in all directions before starting. During the exercise, it’s also important to breath and stay focused while performing assisted handstands.
If you find yourself struggling with these assisted handstands then start on the wall first. Doing handstands on the wall is helpful because it helps you develop the strength and helps keep you straight even before you lock in your balance. Don’t be afraid to take a pause and practice your handstand on the wall for a couple days before coming back to the assisted handstand bands. It’s very important that you learn what ‘straight’ feels like so you don’t establish a bend in your back while you handstand.
When doing your handstands try to pay close attention to the positioning of your glutes, thighs, legs and toes. When engaged in a handstand make sure to squeeze your glutes, press your thighs together and rotate your hips inward to keep you legs straight. In addition to keeping your legs straight, keep your feet together and point your toes up. Keeping your toes pointed should active noticeably activate your calf muscles, which is a great indicator that you are doing these correctly.
Nailing a perfect handstand is a challenge that many of the greatest athletes struggle with. Keep working at it several days a week and watch your body make slow gradual improvements. Remember that every little gain in balance and strength adds up in the end. Just keep working at it several days a week and pay close attention to your form -- your handstand game will surely improve tremendously!
Check out our calisthenics store for a complete line of bodyweight training equipment!