Read Between the Lines: Straightening Up Your Handstand Pt 1
You might be able to overhead press your body weight, you might be able to planche for front lever, you might be able to do a bend back with your legs straight, and yet, for some reason, your handstand still ends up lacking. Why is that? It is because handstands are a combination of balance, strength, mobility, control and practice. Having any less than all five of these elements will punish your calisthenics training and leave you wanting more from your handstands.
Before we troubleshoot your handstands, let’s take a look at how handstands work. The easiest way to understand the handstand it is to look at how we stand on our legs and draw parallels between our lower and upper body. To maximize strength in a standing position, the muscles from the foot to the core must do a few different things. Starting from the bottom and working our way up:
1) Our feet must act as a steady anchor point. The three main points of contact that allow us to balance when we stand are the heel, and the ball of the foot beneath the big toe and the littlest toe. If weight is distributed evenly between these three points of contact it becomes very easy for the body to sit upon these balance points without falling over.
2) Our feet (should) must remain active through the arch, as this allows the foot to react to changes in balance point and weight more effectively than a flat foot. This also helps in generating rotational force at the hip, which can allow for an even stronger standing position.
3) Our calves and tibiales anterior must work with one another to stop us falling over forwards or backwards. To do this as effectively as possible, they must both be mobile and strong- one reason many people lack balance when standing on one leg.
4) Our quadriceps, hamstrings and hips must be able to create torque at the hips to keep us standing as steadily as possible. They must also be able to relax and co-ordinate amongst themselves should we lose balance while standing.
5) The stabilizers of the hips and core are also central to being able to stand in a way that is strong and steady. If any of these stabilizers are overactive or too relaxed, it can create an imbalance that wildly reduces the ability to be strong in a standing position, as well as possible discomfort.
As you can see, standing is a very complex activity, even without properly looking at core function and the interplay between the upper and lower body. Handstands are just as complex as standing on our feet at the level of muscular interaction, strength and balance, however, our typical daily habits (typing, writing, sitting at desks) coupled with our lack of hand standing practice makes standing on our hands much less achievable than standing on our feet. Things like typing and writing use the muscles in our hands, fingers and wrists in either a neutral or flexed position with a very limited range of motion. Being tasks we repeat often, this encourages the muscles in our hands to become used to flexion, where for handstands we need to be able to extend to create a base of support. Sitting and writing at desks encourages flexion as well – this time flexion at the thoracic spine from bending over to write or type, and hip flexion from having your legs supported by the chair.
I’m not saying you should stop writing, typing, sitting or anything else, but flexion at these joints will make handstands harder to achieve because your hips and shoulders need to be in a neutral position so that your centre of gravity in a handstand is over your hands. Your hips, shoulders and thoracic spine also need to flex and extend to shift your centre of gravity back to neutral if you lose balance. To ensure that your joints can move in the ways needed to handstand, take a break every so often to stretch and mobilise any joints that need it. Ten minutes to fifteen minutes three or more times a day (if done efficiently) will see your handstand line straighten up over time. For the best results, integrate mobility work during handstand workouts to get in as much time as possible. Your calisthenics game will thank you.
Returning to the standing analogy we looked at earlier will help us know what stretches and mobility drills are best suited to these stretching breaks we are going to integrate into our daily practice.
The Main Points To Be Mindful Of In a Handstand
a) Our hands act as the anchor point. For them to be a good, sturdy anchor point they need to be able to extend so that they can sit ‘flat’ on the ground while we are hand standing. They also need to be able to flex in that extended position to catch us should we start to fall towards our backside. Although a contested point within hand balancing practice, I think the fingers should be able to bend as if they are crimping the ground, as I find it creates more strength in the hand and fingers and acts similarly to the arches in our feet in terms of redistributing weight.
b) Our forearm flexors and extensors are the main drivers of movement in the handstand, except for when we shoulder break to stop ourselves falling feet first. This means that the forearms need to be strong and able co-ordinate fine movements if we are to succeed in our handstand.
c) The triceps need to be strong and mobile. If the triceps do not lock out, our arms won’t be straight, and bent arms does not a handstand make. This also means the bicep must be mobile enough to allow lock out at the elbow.
d) The shoulders are the equivalent of the hips in a handstand. They hold up the body’s weight in the handstand, and must be able to protract, elevate and externally rotate for the most stable shoulder base on which to stand. As such, while the shoulders themselves need to be strong, a lot of emphasis should be put into developing the rotators and stabilisers of the shoulder to ensure no injury occurs and hand standing is as easy as it can be for you. This also feeds into having a core that activates correctly in response to your shoulders.
Now that we know what is needed of your shoulders, let’s break down mobility into three, fifteen-minute chunks (which I remind you is the minimum one should spend on mobility if you are working a desk job) you can do each day, with only a band or two handy in your desk or bag.
How To Warm Up For Handstands
1) Shoulder dislocates: 2 sets of 12. In a standing position grip either end of your exercise band, hands both facing the floor. The heavier the resistance band, the less give it has when you go over your head, and the harder the exercise. Raise your arms into an overhead position and then bring the band past your head, dislocating them, until you touch your hands to your back or you get as far as you can. This will open and mobilize your shoulders.
2) Forward fold to shoulder extension: 2 sets of 8. In a standing position, place your band behind your heels. Pick the band up (with straight legs if touching your toes is easy, with bent legs if touching your toes is hard) and trace the band up along the back of your legs. When you are standing upright, pull your arms backwards away from your back as high as you can. Hold at the top for 3 seconds, squeezing your scapula together as hard as you can. Return your arms to your back and trace the band back down to the floor (or as low as you can manage with straight legs).
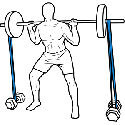
3) Calisthenics bodyweight squat hold to overhead stability: 3 sets of 5. Double loop the exercise band so it is half-length (I recommend using the lightest band you have, or a light weight like a water bottle if no bands are available) and place either side around your wrists. Hold your arms out in front of you at 90/90 and sink into the bottom of your bodyweight training squat. From here, slowly raise your arms into an overhead position while pushing your wrists into the resistance of the band. Ensure you do not flare at the ribs and your spine stays neutral. Hold at the bottom for 5 seconds and squat back up to the top, returning your arms to the starting position once you reach the top.
Take A Short Break:
4) Straddle Ups: 3 sets of 5. Start by sitting on the ground (or on a raised platform like a stair or a couple of thick books) with your legs spread as wide as possible. Place your hands onto the ground and bring your bodyweight over your hands. From here, walk your hands forward until you are able to bring them off the floor and stand up. Stand in the top position for ten seconds, internally rotating the hips. Place the hands back down and slowly lower into the starting position.
5) Trap 3 Raises: 3 sets of 10. These can be done without a band or with the lightest band. Standing in the bottom of a hip hinge position (imagine being in the bottom of a deadlift) loop the exercise band around both feet and grasp the remaining part of the band with your hand, which is thumb-up. Keeping your hand in a thumb-up position, and keeping your ribs tucked in, raise your arm into an overhead position. With this movement you should be elevating the scapula and externally rotating the shoulder. Hold at the top for three seconds and return to the starting position.
6) Resisted Banded Hardstyle High Plank: 2 sets of 5 breaths. Loop a band around your back and grasp each end with a hand. Get into a push up position and protract the shoulders as much as possible. Tense every muscle in your body as much as you can for five breaths while maintaining the protraction.
Take A Second Short Break:
7) High Plank with Hip Extension to Side Plank with Hip Abduction: 3 sets, 5 reps. Start in a push up position. From here raise one leg off the ground without compensating at the back and point the toes. Hold for two seconds and lower. Repeat with the other leg. From here, bring yourself into a side plank position and bring the top leg into the air for a count of two. Swap sides and repeat.
8) Wrist raises. 4 sets of 25, with or without an exercise resistance band. Bring yourself to a quadruped position, wrists under shoulders, fingers parallel to one another. If banded, loop a tension band around your back along your shoulder line. From here press into the base of the index finger as if doing a calf raise for your hands. Lower back to the starting position in a controlled manner.
9) Wrist stretches: 2 sets each way, 30 second holds. In a quadruped position face your wrists away from you. Pushing into the base of the index finger drop your elbow towards you while attempting to keep the base of the wrist in contact with the ground. Repeat with wrists facing in towards one another. These are great to do before any calisthenics bodyweight training exercises.
These drills should help mobilize (and strengthen to a minor degree) aspects of your body that are limiting your handstand line from being straight due to poor day to day habits. Just don’t forget your deodorant because these can bring up a sweat on warmer days!
Acknowledgements:
@holisiticmovement (Harry Williams), @jbjoey (Joe Worthington), @deansomerset (Dean Somerset), Mike Makossa, @quinn.henochdpt (Quinn Henoch). These drills are from them or adaptations of their work.